|
|
Machine Quilting Questions
Answered by Caryl Bryer Fallert-Gentry |
| QUESTION:
What kind of batting do you use in your quilts? |
|
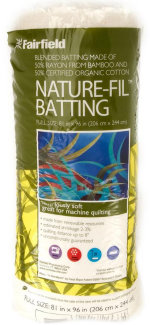
My favorite batting for many years was Fairfield Cotton Classic,
which was 80% cotton and 20% polyester. With the many recent changes in batting, I have switched to Fairfield Nature-Fil, which is 50% cotton and 50% bamboo.
It's the one that has a picture of my quilt "In the Marsh #" on the bag.
I don't ever use polyester batting. I find cotton and cotton-blend a much better choice for
a number of technical and aesthetic reasons. 1. it never beards, 2.
it can be blocked flat with a steam iron after quilting, 3. it doesn't
shift and make puckers while you are machine quilting. 4. it just
feels better. I know that there are a number of cotton and cotton-blend
battings on the market, and I'm sure some of them are very good. I
just haven't tried all of them.
For my three dimensional High Tech Tucks quilts, and for a few of my
heavily machine embroidered fabric collages, I have used 100% wool army. These are available at army/navy surplus stores.
They are very heavy and dense, and so quilts that are dimensional or
distorted by heavy stitching can be blocked absolutely flat, and the
weight of the wool will help them remain flat. |
 |
| QUESTION: For a year I have been learning free hand quilting by machine
and I find it very difficult to move my work smoothly and with constant
speed. Often my movement is blocked because the heavy quilt won't
come over the edge of my working table. Can you give me some advice
or suggestions where to find information about feehand machine quilting
and what kind of sewing machine is best to do this kind of work.
|
Until 1999, I did all my quilting on a regular size Bernina
sewing machine. I find that I have better control and my body is better
balanced if I move the foot control to my left foot. An added bonus
is that I can operate the knee lift with my right knee, and never
accidentally hit the foot control at the same time (thus making hairballs
in the bobbin case).
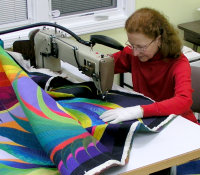
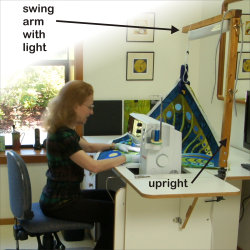
For large quilts I pushed together several tables, desks, etc. so that
the entire weight of the quilt is supported on the table top.
It is much easier to move the quilt under the arm of the sewing machine
if it is not dragging over the edge of a table. As you can see in
the picture, I even set up a little table next to my chair to support
some of the quilt that would otherwise be hanging over the front of
the sewing table or in my lap.
Sometimes I spray a little silicone on the table top to make it more
slippery. (If you try this be careful not to overspray onto the floor,
or you'll have a skating rink)
To get the quilt under the arm of the sewing machine, I roll, pleat
stuff and drag........whatever is necessary to get to the place where
I'm going to quilt. When I reach a place where I can't move the quilt
freely any more, I put the needle down to hold the quilt in place
and re-arrange the quilt. Before I begin stitching I make sure that
the quilt can be moved freely and is not pulling against the needle. When I'm working on a large quilt, I don't focus on the vast sea
of fabric in front of me that still has to be quilted. I just focus
on the six inches of fabric between my hands, and I try to make that
six inches a beautiful as possible. I try to keep my left elbow down
on the table. It relaxes my shoulders, and also helps me move the
big quilt.
 |
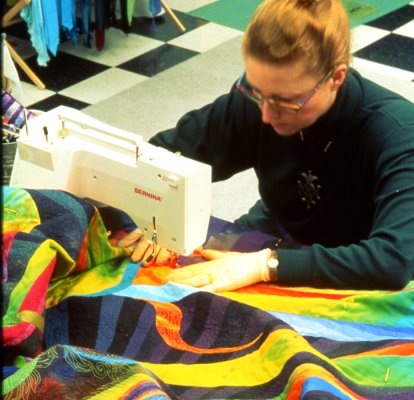
Most of my quilting is free-motion. That means I move the quilt under
the needle with my hands, and the stitch length is determined by the
speed I run the foot control and the speed at which I move my hands.
Getting an even stitch is a matter of practice. Any machine can be
trained to do what mine does. It just takes several hundred hours
to train one.
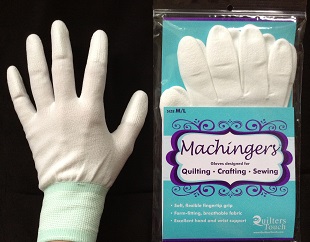
If you have tried free-motion quilting, you know that
after about five minutes all the tread is gone from your hands and
fingers, and it is harder to move the quilt. I wear
some kind of gloves to give me more traction, so I don't have to press down so
hard. My favorites are Machingers from Handiquilter.com. They come in sizes to fit your hands, they are easy to put on and take off, and they have ruberized finger tips to give you more traction.
 |
In 1999 I bought a Legacy, a customized industrial machine that has 21" under the head. I love the extra scooching room, especially when I'm working on a large quilt. On this machine I can do both regular sewing (with feed-dogs) and free-motion quilting. It is very heavy (head weighs 200 pounds) and if service is necessary, you need to find a technician who makes house calls. I have tried both the Handiquilter machine and the George from APQS. Both are extended-head, sit-down machines that are designed exclusively for free-motion quilting. I would recommend that you try both of them at one of the big quilt shows, and choose the one that best fits your needs. |
| QUESTION:: I've noticed that many of your
quilts are very heavily machine quilted. How do you decide on a
quilting design, and how do you mark it? I'm especially interested
in
the machine quilted feathered plumes I've seen in many of
your quilts. |
|
Most of the quilting I have done has been
free-motion,machine quilting. That is, I lower the feed dogs on
my sewing machine, use a darning foot or other free motion foot,
and manually move the quilt under the needle. With this kind of
quilting, the stitch length is controled by the speed of your needle,
and the speed of your hands as you move the quilt. After hundreds
of hours of machine quilting, I am comfortable using my machine
as a drawing tool. Generally, I try to approach my machine quilting
intuitively. I think of it as "doodling with thread".
This kind of quilting is as unique to the individual quilter as
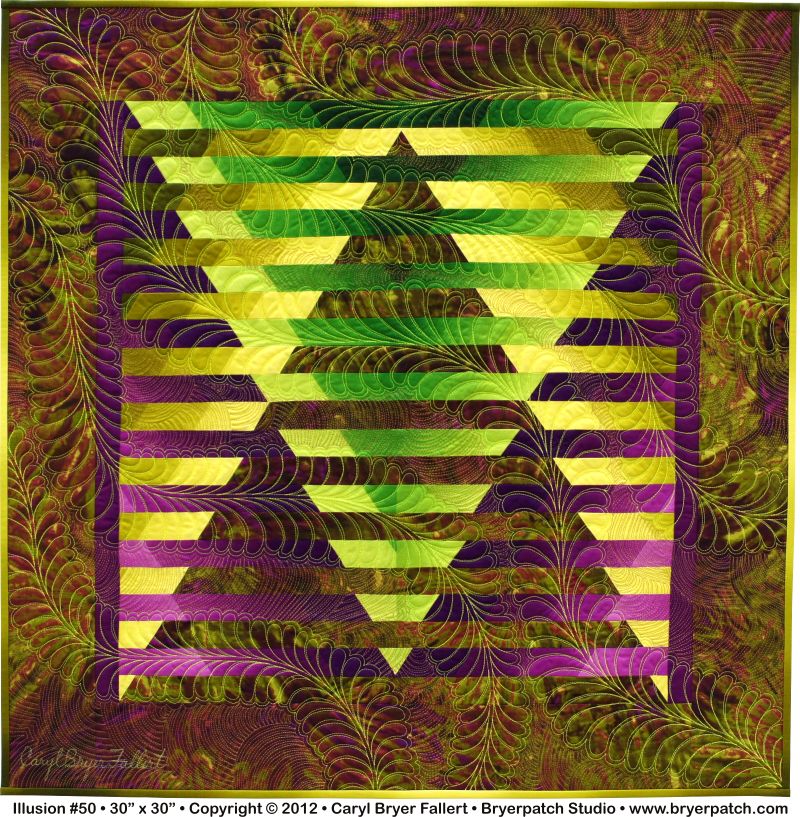
handwriting or a signature. Since 1983, when I began making whole
cloth quilts from my painted fabrics, I have wanted the quilting
to be more than just a decorative way to hold the layers of the
quilt together. I want it to be an important part of the overall
design. In most of my quilts I have used #40 polyester top-stitching thread. If I want the thread to show up more, I sometimes use #30 top-stitching thread and make sure that the thread color contrasts with the background fabric in both color and value. If I want the thread to show less, I may use a bobbin-weight thread like Superior Bottom Line and match the thread to the color of the background fabric.
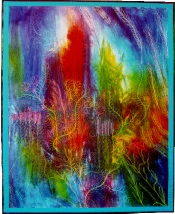
Nectar Collector is a good of example of a quilt in which the quilting becomes the whole design. Most
of the imagery in this quilt came directly out of my imagination.
When I was a child I used to lie in the back yard in the summer
and watch the clouds. After a while, I could begin to see animals,
or faces, or other pictures in the clouds. The quilted images developed
in much the same way. I sat and looked at the painted fabric, until
a picture developed in my mind. Then I quilted the picture. Most
of the imagery is of various flowers, leaves, and weeds. These images
represent my feelings when I experience flowers and weeds, and not
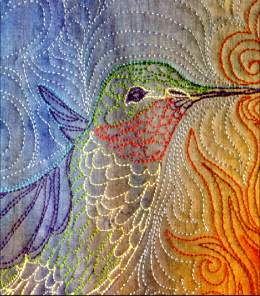
any specific botanical species. When the quilting was about three
quarters finished, a friend saw the quilt in my studio and said,
"you ought to hide a bird in it somewhere." At first I
rejected this idea. The next morning, however,the large red-orange
weed in the center began to look very much like the sort of plant
a hummingbird would like, so I quilted in a hummingbird, collecting
nectar from this plant. Thus the title "Nectar Collector."
The humming bird needed to to have anatomically correct proportions,
so I drew the humming bird with a white pencil and followed the
pencil lines. Click here for detail.
The rest of the quilt was stitched free-hand.
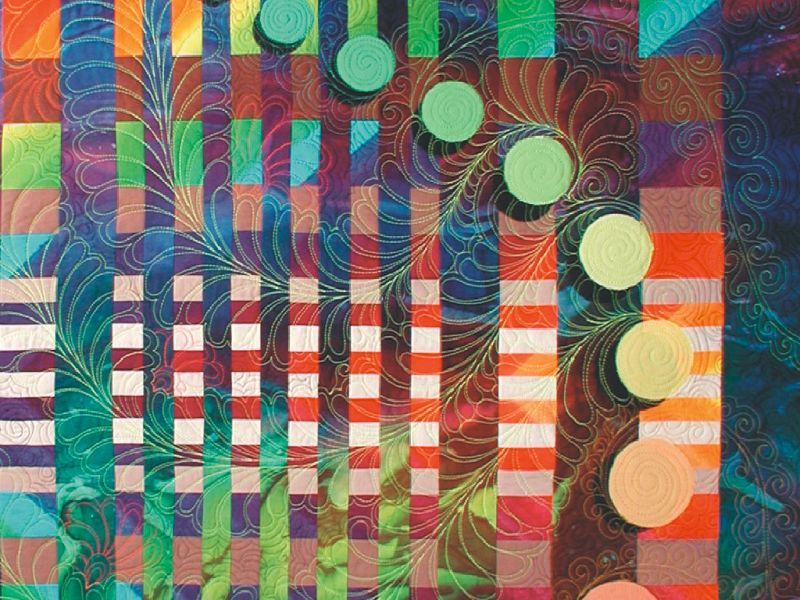
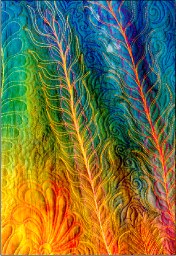
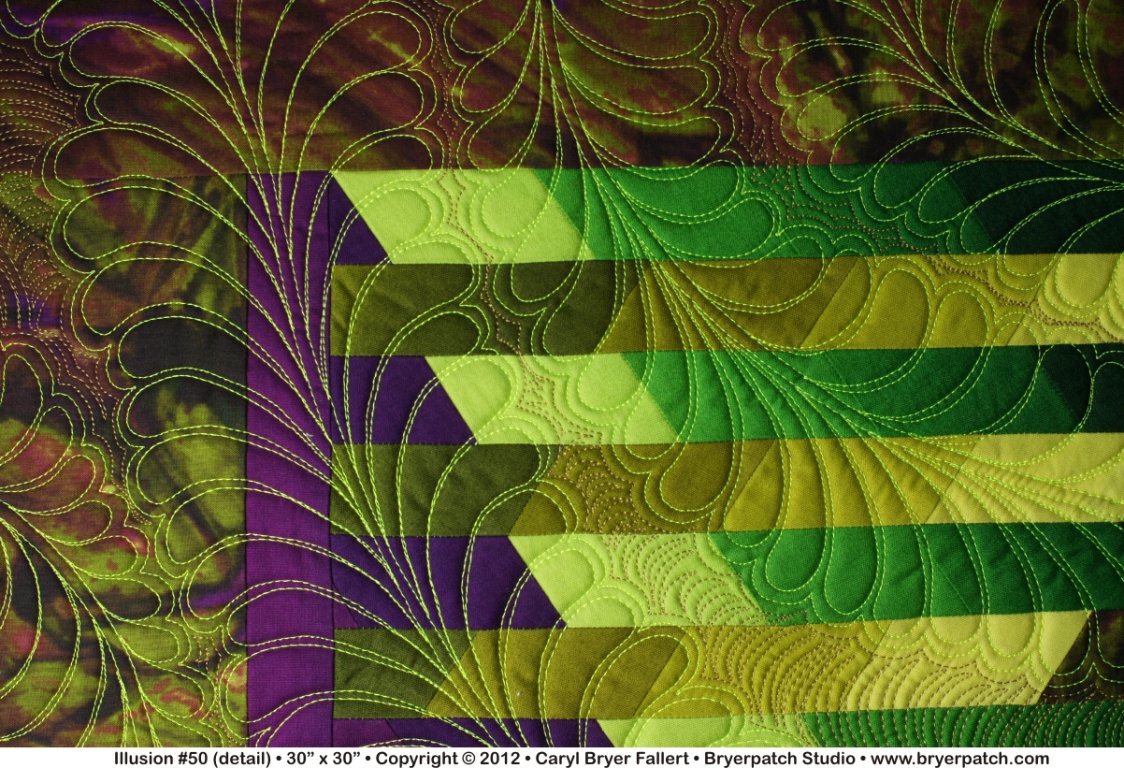
As you mentioned, many quilts have included a
variation on the traditional "Feathered Plume" quilting
motif. These plumes tend to become major compositional elements
in the overall design. Where they start, where they stop, and what
path they follow along the way, is important to the balance of the
whole composition. The path of a feathered plume is determined by
the path of the center stem, so all I mark is a single pencil line,
indicating the center stem. The "feathers" themselves
are stitched freehand. As long as the base of each feather ends
up along the center line, I know I'm on the right path.
I don't often plan the quilting while I'm making the quilt top. I generally just make the quilt sandwich and make up the quilting patterns as I go.
When I do mark, I generally uses either a white charcoal pencil
(available in art supply stores like Michael's) or a Sanford verithin. These pencils will chalk off easily, so they don't
leave pemenant marks on your fabric. Be sure to remove all the pencil
before blocking your quilt with a steam iron, as the steam can set
the charcoal marks. I find that a clean piece of cloth rubbed over
the marks works as well an anything to remove them.
To see details of the quilting in each of my quilts, go to our gallery and follow the links to hundreds of complete quilt records. Each of my quilt records includes further links to large, close-up images of the quilting. |
| QUESTION:
Do you block your quilts to make them
hang straight? If so, how do you do
it? |
|
| When I finish a quilting, I lay the
quilt face down on my (clean) rug, and
steam it with a steam iron. I'm not
really ironing it, just barely touching
the iron to the back of the quilt. The
pile of the rug prevents the relief
pattern of the quilting from being flattened
out. Once the quilt is blocked flat,
I lay it on a huge cutting board on
my black and white tile floor, and square
it up. |
click for larger image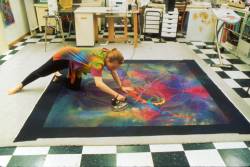 |
| QUESTION:
What is that suspension thingy hanging over your machine and how does it work? |
|
|
Printable
version
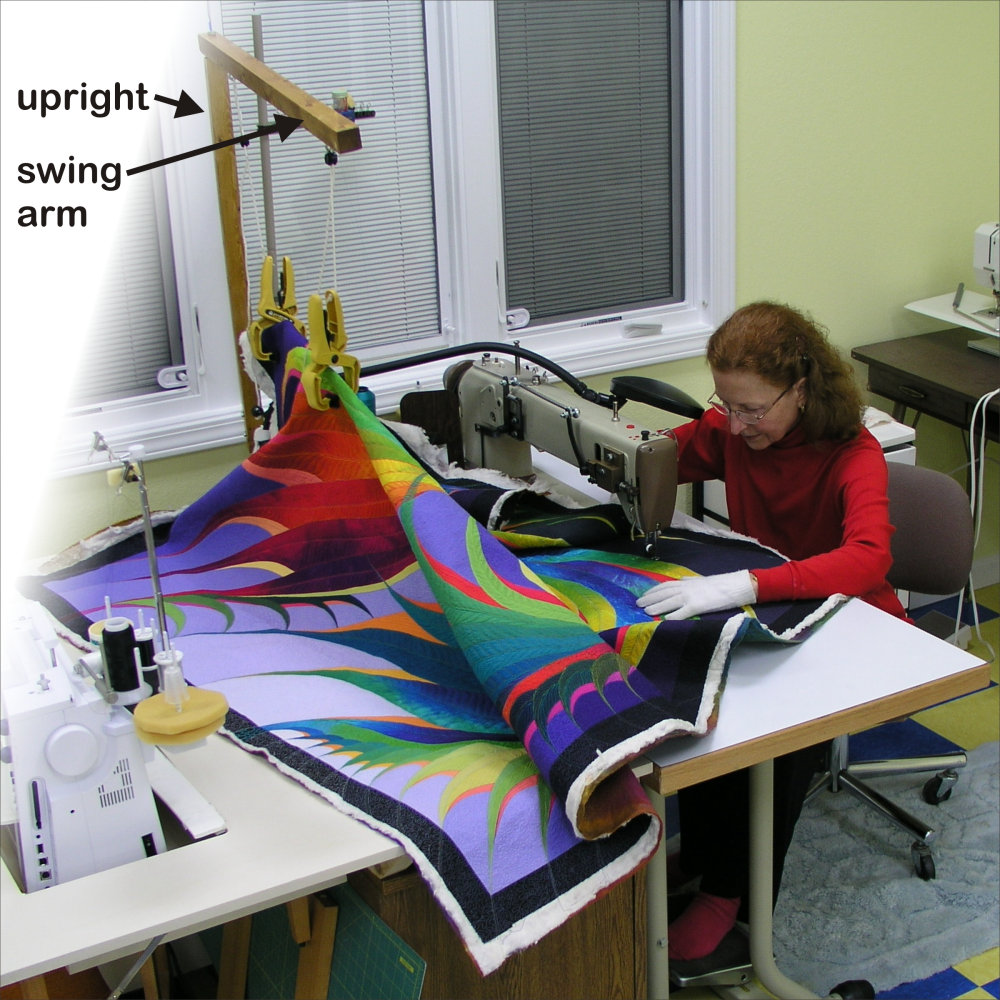
One of the most frequently-asked questions I hear is about the system of clamps and pulleys that hangs over my sewing machine. I use it when I do free-motion quilting. It suspends the part of the quilt you are not working on in the air, reducing the amount of weight you are moving with your hands, and making it easier to move the part you are working on. A cord lock allows you to position the clamp at any height and easily raise and lower it as you work.
Many years ago I met Carole Leroy at the AQS show in Paducah. She was an expert on ergonomics and had written a book called Pain-Free Quilting. She had also developed a “quilt cradle” which she and her husband were building and selling. Later they sold a kit and a set of instructions from their website, painfreequilting.com. In the past, when I got questions about my suspension system I referred everyone to that website. Now, they seem to have taken down their website and I can no longer find them, so I’ll share some pictures of my apparatus and you can develop your own version to fit your needs.
My quilt cradle was built by the Leroy’s and I have modified it differently in each of my studios to fit my personal set-up. Almost everything is made from basic supplies that you can buy at any hardware store.
FRAME
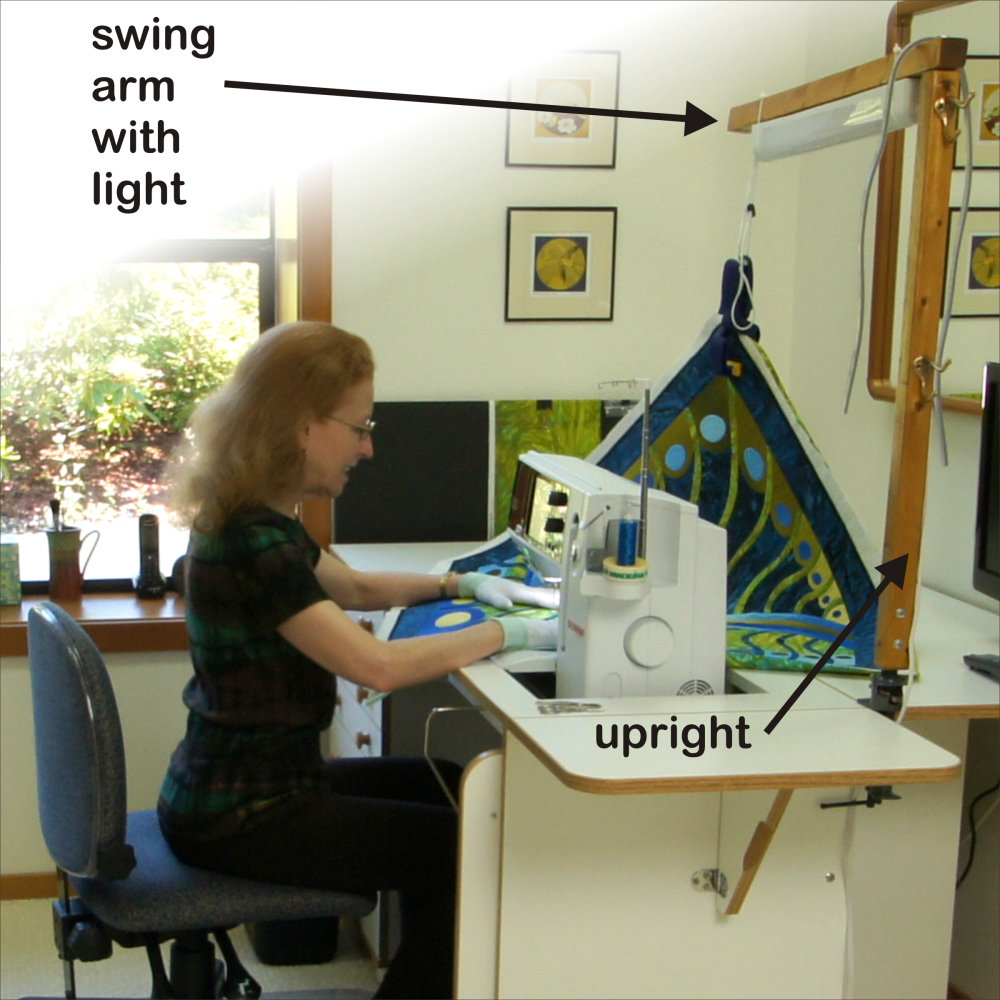
The frame is made from two 30” 2x2s, one is the upright support and the second one becomes a horizontal arm that swings over your sewing table. My current table is 5 feet wide, so I have extended the arm by clamping on another strip of wood. You could also just make the swing arm longer. In my Paducah studio I eventually abandoned the frame altogether and just hung the pulleys and clamps from the ceiling. In my first Port Townsend studio, I needed more light, so I attached a light strip to the swing arm. I also added a couple of closet hooks to the upright. They provide a convenient place to hang glasses and magnifiers. |
click for larger image
 |
| The upright is attached to the table with a pipe clamp (a tool used for furniture repair). The clamp holds a section of steel pipe. The pipe fits into a hole of the same diameter drilled into the bottom of the upright 2x2. To prevent wobbling, two big bolts run through the pipe and the 2x2. |
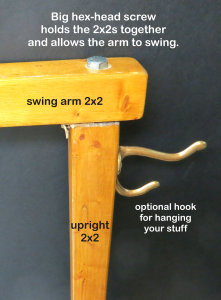
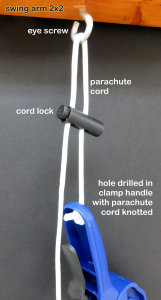
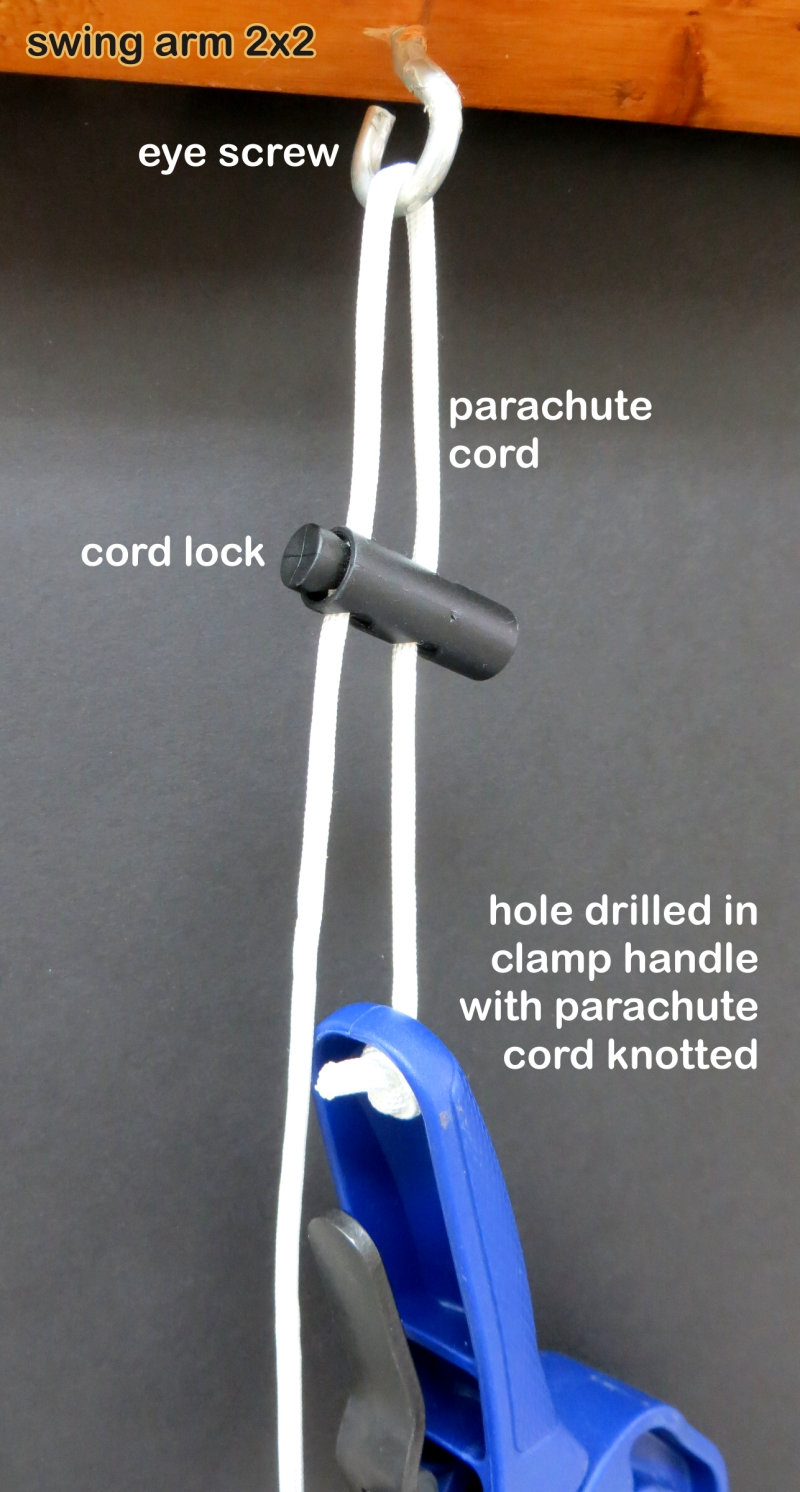
SWING ARM
The 2x2s are joined at the top by a big, hex-head screw, which allows the horizontal 2x2 to swing. A hole is drilled in the handle of a quick release clamp and parachute cord is pushed through the hole and knotted. The cord is fed through a cord lock (see below), and a loop of cord is hung from an open-ended eye screw in the swing arm. Position it where you want to lift your quilt (probably just behing the needle). Just push the button on the cord lock and pull on the cord to adjust the height. Parachute cord and cord locks of all kinds are available online from many different sources including Strapworks.com. |
click for larger image
 |
click for larger image
 |
click for larger image
 |
|
|


