|
|
Questions About Storing, Shipping, Hanging, and Lightfastness
Answered by Caryl Bryer Fallert-Gentry |
For the 30 quilts in my 30th anniversary show, I purchased a special, waterproof, Pelican case that holds and protects the whole exhibition. All of the quilts are stacked and then folded gently over a pool noodle to prevents fold lines.
For larger quilts, I still prefer to roll rather than fold so, for many years, when I finished a quilt, I made a special shipping tube for it, which also served as a way to store the quilt when it was not on display. Scroll down for more instructions. The tubes are heavy cardboard Sono tubes with plywood circles tacked into the ends. A smaller cardboard
tube or pool noodle goes from top to bottom inside. This cardboard tube is covered with cloth,
so the quilt doesn't touch the cardboard. The quilt is rolled
around the inside tube, then wrapped in cloth. I fold in the ends of the wrapping cloth and tie the roll with strips of fabric tied in bows, so it's easy to untie them. (selvage edges work very well). The rolled
quilt goes into a sleeve of plastic tubing (available by the roll from Uline.com) and the whole thing
slides into the large Sono tube. Since
all my tubes look similar, I put the name of the quilt on the
outside of the tube, so I can locate it when I need it. When one
quilt sells, the tube can be recycled for a new quilt.
Sono tubes can be purchased at many lumber yards. You
can also get them from concrete contractor supply places (look
in the yellow pages). They are used as concrete forms. You can cut them with a saber saw, or you can have the supplier cut them to the length you need.
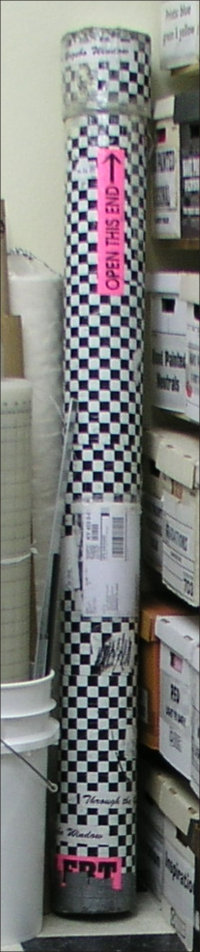
Here is a tube that has been around the world a couple of times. It's not as pretty as it was when it was new, but it is still very functional. The tube is covered with contact paper & clear tape. (LOTS OF TAPE). I line the inside of the tube with the same plastic tubing I use as a sleeve for the rolled quilt.
I generally cut the Sono tube several inches longer than the width of the quilt, so the quilt is not resting on it's edge in the tube. Ideally the center core will be the same length as the Sono tube and will hold the quilt, suspended, an inch or two from the top and bottom edges of the tube.
The cap is made from an extra section of tube which is split along the edge and expanded to fit around the outside of the main tube. I insert a spacer into the split made from another slice of tube or from a piece of foam core.
I tape return address information and a picture of the quilt at the top of the tube, under the cap. When it's going to a show, I add a small picture of the quilt.
The bottom of the tube and the top of the cap are made from circles of plywood or foam core, depending of the size of the tube. |
|
Since my quilts are often going in and out from various exhibitions, I need a flexible hanging system that doesn't require patching holes and repainting.
My Paducah studio/gallery was in a building that was traditional in style, so I installed picture moulding just under the ceiling, and used picture hooks and fish line to hang the quilts.
My present studio/gallery is more contemporary in style, so I paid the big bucks and bought the Walker display system, which is used in many museums and commercial galleries. (see pictures below) The moulding is very unobtrusive and the hooks connect to vertical rods which can be hung without using a ladder. The Walker rods are a bit thin for large,heavy pieces so I'm still using paper-clip hooks and/or fish line to connect some of the larger quilts to the walker hooks, but the Walker hooks slide very easily in the moulding and the quilts can be repositioned from the floor.
I have also developed a simple way to hang quilts temporarily in the middle of a room without making marks on either the ceiling or the floor. It starts with two spring-tension shower rods from Walmart or Home Depot and two 7' sections of steel or aluminum pipe. Electrical conduit pipe will work.
- Drill a series of holes every few inches along the top 2-3 feet of the pipe. Be sure the holes are the same distance from the top on each pipe.
- Remove the plastic end-cap from the smaller end of the tension rod.
- Slide the pipe into the small end of the tension rod with the holes at the top.
- Place the plastic end cap over the exposed end of the pipe.
- Twist the tension rod until the pipe makes firm contact with the ceiling.
- Unbend the centers of two paper clips, but leave the bends in the ends.
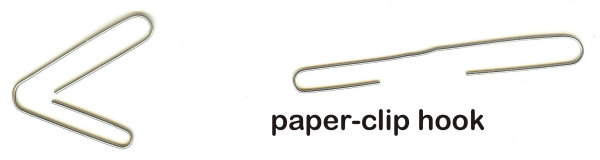
- Hook one end of the paper clips into the holes in your quilt's hanging rod, and hook the other ends into holes in the pipe at the height where you want to hang your quilt.
|
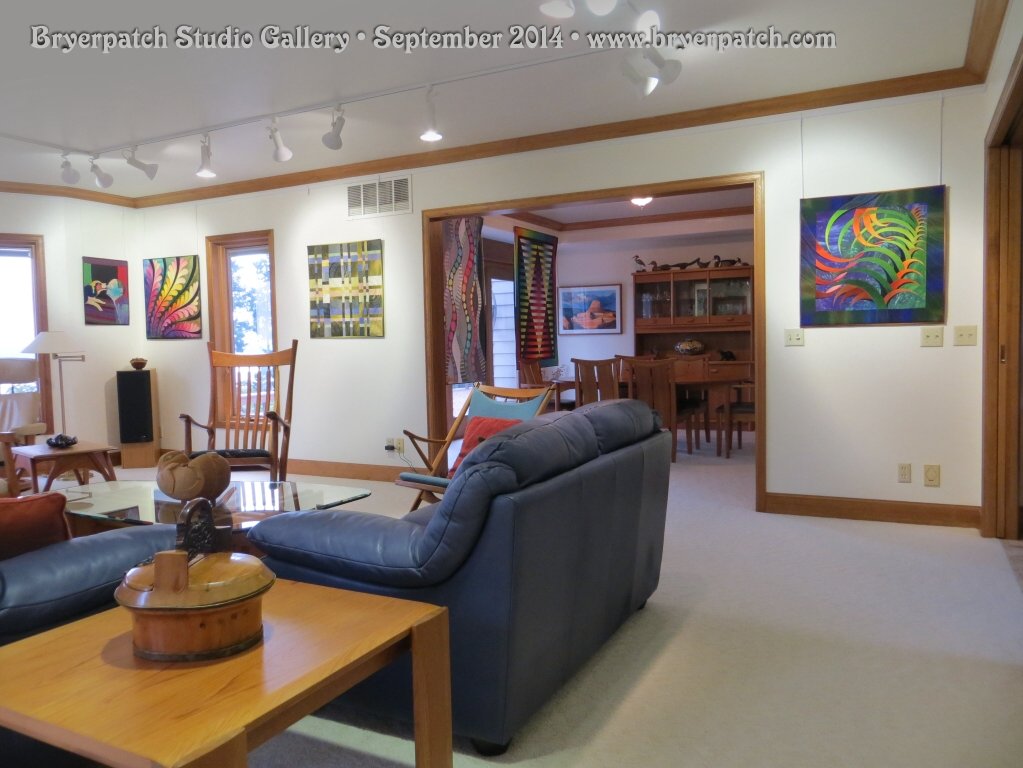
This picture below is from my former Paducah KY gallery and shows both the picture rail system (on the back wall) and the tension rod system for displaying quilts in the middle of the room.

|
| QUESTION: What kind of rods do you use to hang your quilts. |
I like the hanging devises to be invisible when my quilts are hung, so I have developed an invisible hanging system that has served me well for many years. My rods are
made from either flat aluminum bar (for quilts up to 54")
or steel pipe (for larger quilts). In the past, some of my rods
were also made from flat wooden lattice strips. Wooden rods are
thicker than aluminum, and need to be cut, sanded, and painted
to prevent acids in the wood from damaging the fabric. Consequently
I no longer use wood.
The aluminum bar can be purchased at almost any hardware
store or home center. I usually get 1"-1½' bar for the
top rod, and ½" for the bottom rod. This will work well for quilts up to about 54".
The advantage of aluminum bar stock is that it is clean, light
weight, very flat, and does not need to be painted. It is easy
to cut with an inexpensive hack saw. I smooth up the cut ends
with a file, and use an electric drill to drill a hole in each
end that is large enough to slip over the head of a #8
finishing nail. The disadvantage is that the aluminum is expensive,
so I get a little testy when shows do not return my rods with my
quilts.
For quilts over 54", the aluminum tends to bow, so for larger, heavier quilts I
use the kind of galvanized steel pipe that is used for electrical
conduit. It is also clean, relatively light weight, inespensive, and does
not require painting. It can be cut at home with a
hand-held pipe cutter. It will hold most quilts up to about
seven feet without sagging. It can be drilled with a hand-held electric
drill, but you may need to drill small "pilot" holes
first.
For very wide or very heavy quilts (such as my High Tech Tucks
quilts) I use heavier steel plumbing pipe. You can get "black pipe"
which is relatively inexpensive, but it is covered with the worst
sort of nasty black grease, and needs to be cleaned and painted
before you use it. You can also get galvanized pipe, which is
more expensive, but does not need to be painted. These pipes
need to be cut with a heavy duty pipe cutter, or you can pay
a little extra to have it cut to size at the hardware store. In the case of quilts that are wider than they are high, my shipping tube may not be as long as the rod. In that case, I
have the rod cut in half, and two of the ends threaded at the
hardware store. Then I buy a connector, so the two ends can
be screwed together to form the full length rod. I am able to
drill this pipe with my electric drill, but I need to drill
very small pilot holes first before enlarging them to fit over the
head of a #8 finishing nail. A drill press works better
if you have access to one.
In all of my hanging devices, I cut the rods about ½" shorter than the width of the quilt, or just even with the binding. I drill the holes about ¼" from the end of the rod. The hanging sleeves at the top edge of the quilt ends about 1" from each edge of the quilt.
When I'm ready to hang a quilt in a permanent location, I place the rod against the wall where I want to locate the top of the quilt and drive a finishing nail through one of the holes. I use a level to make sure the rod is perfectly horizontal and then drive a nail through the other hole. I slip the rod off the nails, slide it through the hanging sleeve on the quilt and hang it back on the nails. The nails may need to be driven in a
little further to prevent distortion at the corner of the quilt. |
After one of my quilts is hung, I slip a ½" aluminum bar through a narrow sleeve at the bottom.
Generally speaking,
I don't mind if quilts and other kinds of textile art waffle a
little when they are hung. They are after all textiles, and "waffling"
is a characteristic of many textiles. For my own quilts, however,
I feel that since the overall look is very finished and "tailored",
I would like them to be square and to hang
straight. This rod is not intended to weight the bottom. It just keeps it straight. |
| QUESTION:
How does light affect your hand-dyed quilts when they are hung? |
Those who have
studied the light-fastness of fabric report that the fabrics hand dyed with fiber reactive dye have just slightly more light-fastness
than the average comercially dyed fabric. They will definitely
fade with prolonged exposure to UV rays, but will hold up a little
better than most commercial cottons under the same circumstances.
If I am going to be installing a quilt in a commercial setting
where the light filtration is questionable, I usually spray the
quilt with a UV protector.
This is like sunscreen for your quilt. If it is exposed to enough
light, it will still sunburn/fade, but it takes much longer for the fading to
start. There are dozens of brands on the market, some of which are sold at the big quilt shows. I usually buy mine at the local boat supply store.
The quilt should never be hung where direct sunlight will reach
it at any time of the day. If the quilt gets bright, indirect light, use UV filtering film on your windows. We had this kind of film installed on all of our windows before we hung quilts in our Port Townsend home.
If flourescent lighting will be shining
on your quilt for many hours per day, the flourescent tubes should be
covered with a UV shield. You can get sleeves that fit over the tubes or film that clings to the tubes. Suppliers come and go, so you may need to research suppliers online.
|
I get lots of questions about this, but it is far outside my area of expertise. Here is a website where you can get expert information about conservation:
Textiles
Conservation Discussion List |
|